The generic images are here: They are in .png format. Save them to your pc.


Here's the name for each of the above symbols, starting on the left.
Bloglovin
Etsy
Google +
Pin It button for Pinterest
RSS feed
Youtube
First, you need to decide on which buttons you want to use on your blog. Make a folder and save these black .png images in that folder.
Open Picmonkey Click Design.
You will see a large white square image. Click Canvas Color and then put a check mark in the box
that says Transparent canvas. Click apply.
Now click the Butterfly, which is overlays.
Click Your Own, at the top. Open the folder where you saved the black social media buttons..
Click one of the buttons you want.
You will see this below.
Now click the color chart on your right and find the
color you want to use, and write down the color code,
so you know exactly what color you want to use for all of your other social media buttons.
Now move your icon to the top left of your transparent square.
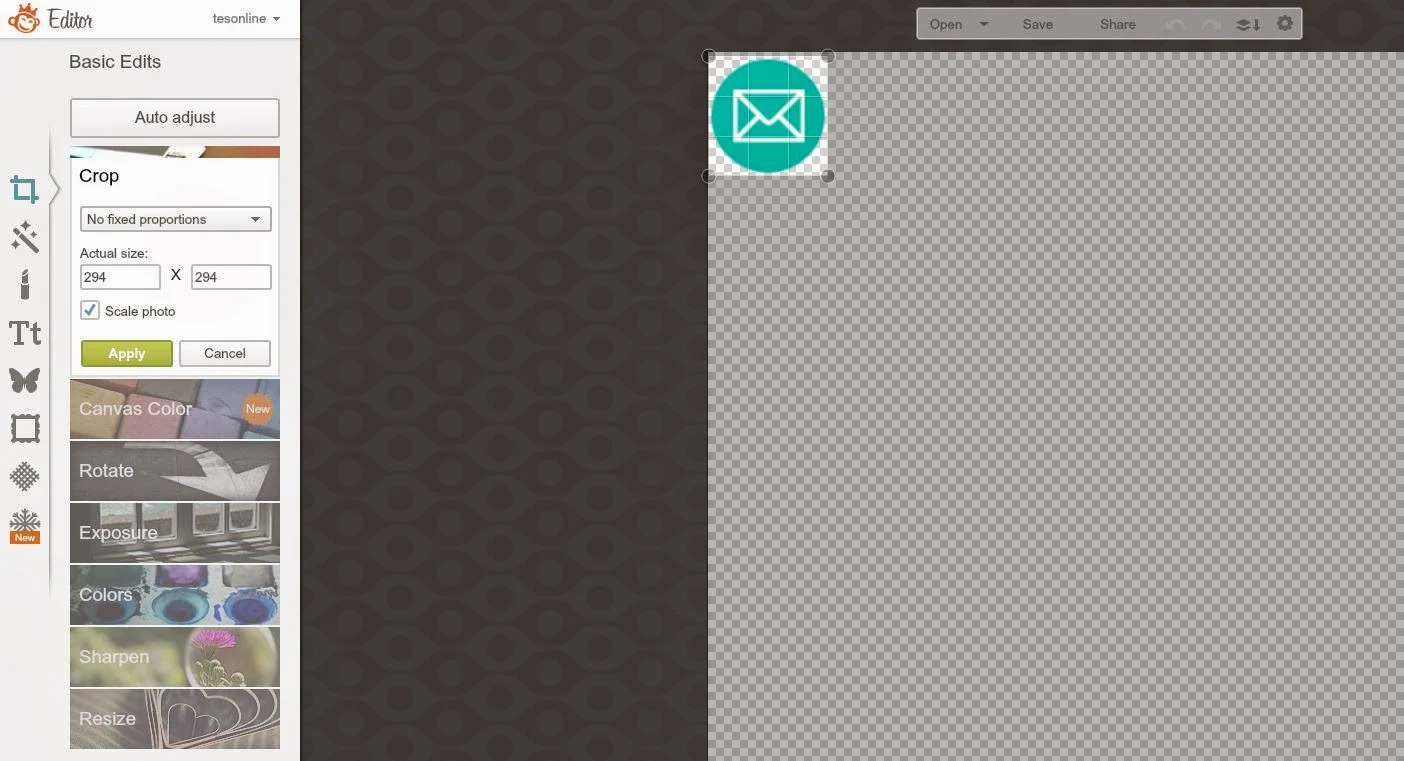
Now click the basic edit button.....and then click crop.
Ok, now we have to crop the image, so we drag the large square, so it encloses the social media button like this.
Look to your left, where it says crop.
Put these numbers in after you drag the box around the button. Click apply. You should see this below.
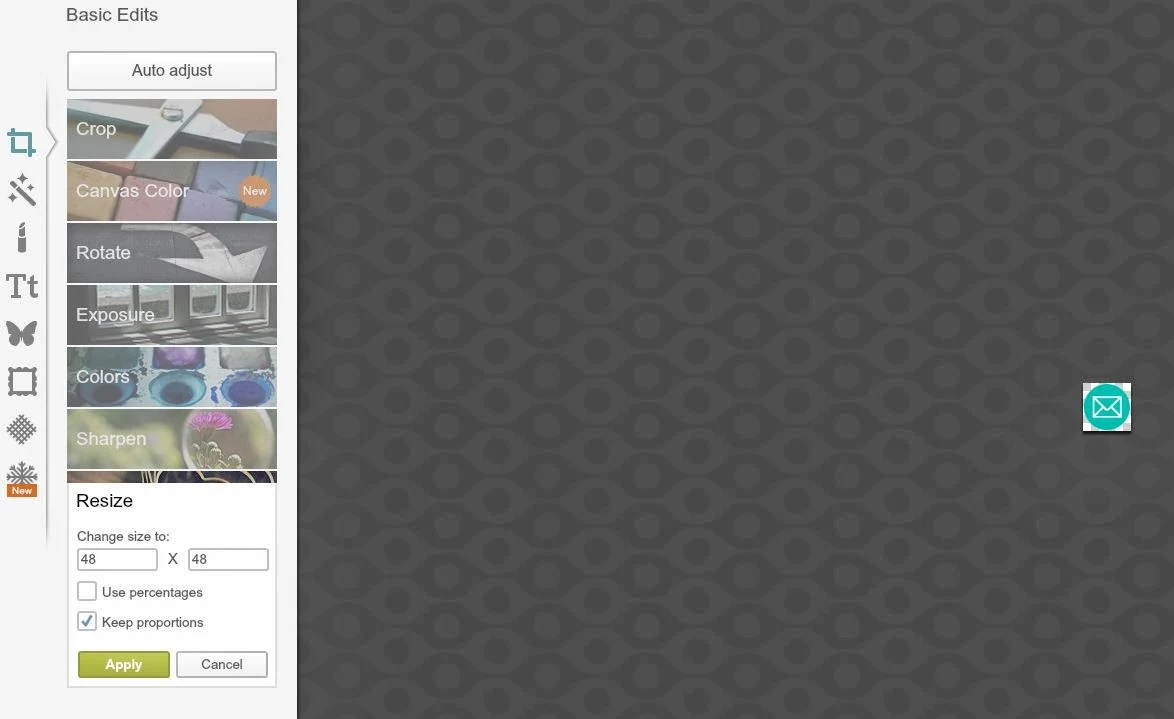
Now click Resize.
Make sure you put the size you want in there.
I am choosing 48px by 48px. Click apply.
Ok, let's save it. Give it a name, such as blue email button, and save it to your social media folder.
Make sure you save it in .png format.
Do this for all of your buttons you want, just name each file with what you are using, blue bloglovin, blue rss, blue email, blue pinterest, etc.
Have fun and make some pretty colored buttons!
The previous post shows how to add social media to your blog the easy way.
Joining the following linky parties.
Thursdays Favorite Things @ Katherine's Corner
Sign up with your email address to receive the latest updates straight in your inbox.


Good Evening Linda, Thank you so much for this visual tutorial. I am a visual learner as well and once I see something visually, I am fine. I am saving this information so that I can have my own prettily coloured social media buttons.
ReplyDeleteYou are marvellous, and so kind and generous. I have learnt so much from you.
Best wishes to you,
Daphne
Linda
ReplyDeletethank you for sharing this. My hope is someday to be able to do my own design work on my blog!
What a wonderful tutorial, Linda! Now, my Bloglovin' button has a white ♥ - clipped yours from your bloglovin' button and on PhotoScape I pulled the empty black button up and as an overlay, added the heart, making it a tad bigger, to better fit the button! Looks great too! {the pink heart was OK, but I love the white heart}
ReplyDeleteYou are great w/ picmonkey!!
ReplyDeleteGreat tutorial, Linda. I'm bookmarking it. Love PicMonkey.
ReplyDeleteI made my buttons, thank you so much for the tutorial! But I don't know how to add them to my blog :( Please help! Thanks again, -Bev
ReplyDeleteThanks for this great information! I'm pinning it because I am determined to revamp my blog in the next week.
ReplyDeleteMorning, Wonder Woman,
ReplyDeleteGreat tutorial! I only just started using PicMonkey, I'm so late to the game! It's such a handy tool and I never thought of using it for this. Thanks so much.
Calling tomorrow, hope to find you in. xoxo
Hi linda!
ReplyDeleteI don't know what I would do without picmonkey! This is such a grest tutorial and I will have to come back several times to see what fun I could have. Have a super day anita
What a great teacher you are, pretty Linda.
ReplyDeleteHow're you feeling these days? I'm still keeping you in my prayers and hope all is well with you. xo
I need to start using picmonkey. Thanks for the tips Linda.
ReplyDeleteGreat step by step tutorial and then we can come back when we forget how - (you know me!) But I have remembered and have started putting pages in under my categories - yeah!
ReplyDeleteThis looks so simple that even I might be able to figure it out! lol
ReplyDeleteThanks so much for this tutorial! I hope to have some free time thhis weekend to try making my pins
ReplyDelete