If you don't have the pages gadget, you will need to add one. It's a great navigation menu, placed below your header.
Just add the Pages gadget... I already have pages, so my links show up in the list.
I will get back to how to add them further below.
Now on to the labels and linking them into your page navigation.
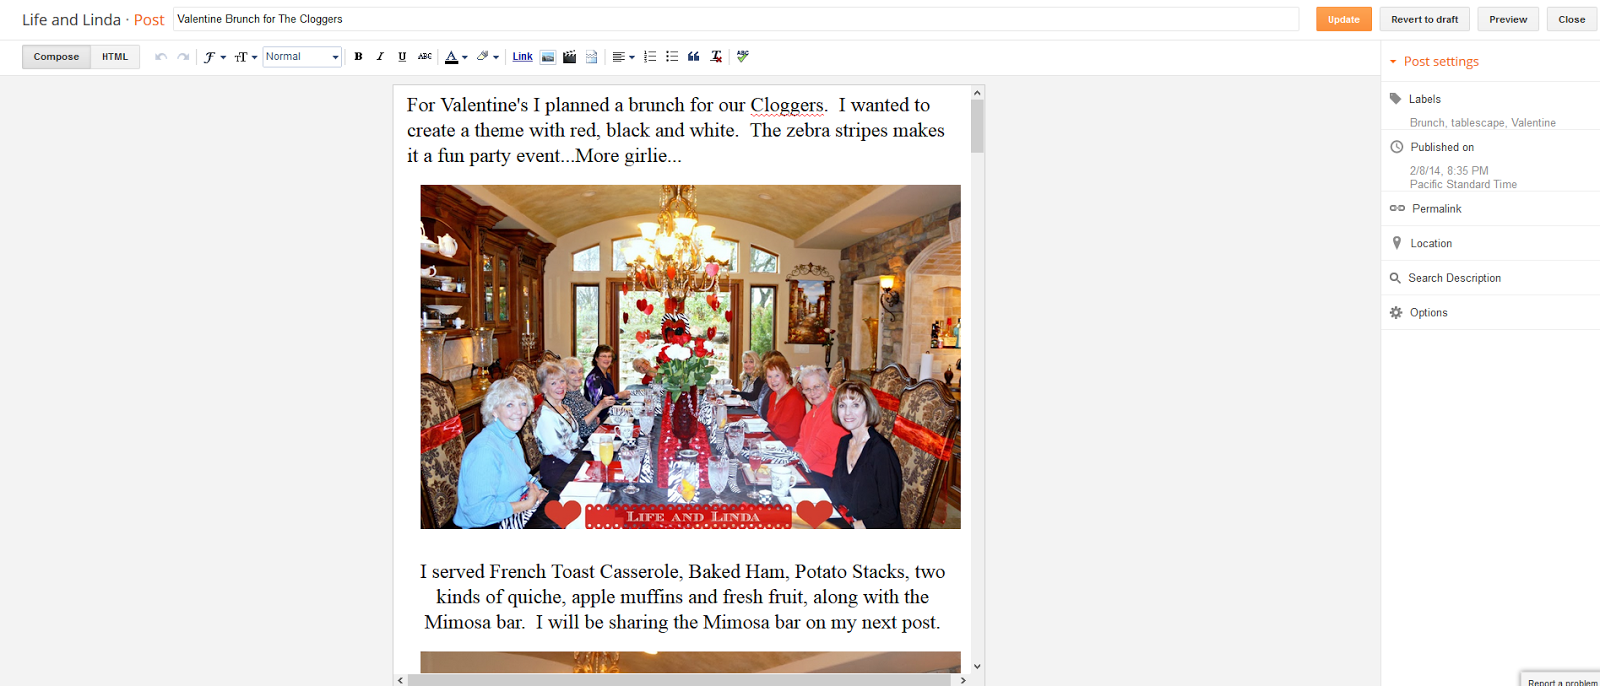
First step is open an existing post or compose a new one. On the right, there is a menu called Post Settings.
Where it says labels, type in about three labels. Mine is valentine, tablescape, brunch,
Add a comma by each label and then click done. Publish your post!
Next, after your post is published, you will see the labels you selected at the bottom of your post.
I am going to show you tablescape, since I have quite a few posts with that category.
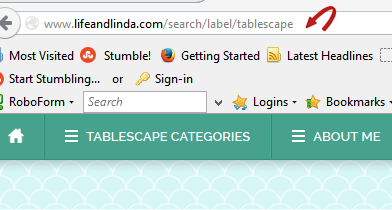
Click the label tablescape on the bottom the post. It will open a page like below:
Notice the address? After my blog name there is a / search/label/tablescape
Copy that url address!
Next step go back to your Blogger dashboard and click Pages.
Click where it says + Add external link, you will see a page like the one below:
Type in the Page title and then add that link you copied from your browser.
Click Save link!
Ok. you can do this with different categories for a menu bar. Keep adding more labels, such as recipes, crafts, decor, etc.
This pages gadget should go under your header.
How to center your page's gadget.
Click Template and then click customize. You will see this window.
Click Advanced!
In the white area, type in this code below:
.PageList {text-align:center !important;}

.PageList li {display:inline !important; float:none !important;}
Click ENTER on your keyboard for it to work. After you preview it, click Apply to blog.Ta da! The pagelist should be centered!
You now have a navigation bar on your blog and you are using your blog's labels as search categories. Be creative!
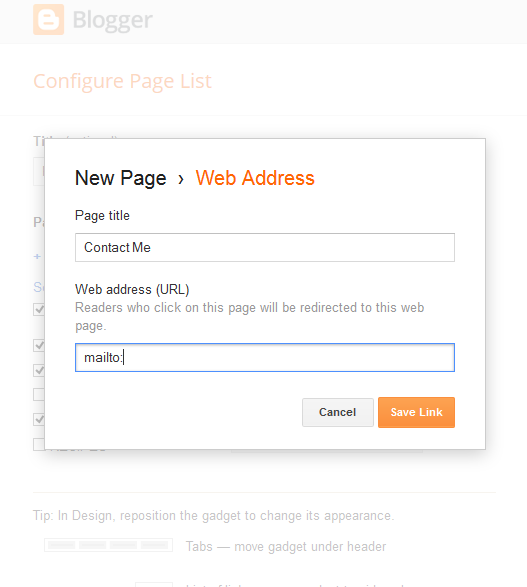
If you want to add Contact Me (your email) in your navigation bar, the go to your Pages gadget in your lay-out. Click Add external link
Give it a title, such as Contact Me or Email
Below that, type mailto: Add you email address right after mailto:
Click save link.
Ok, let's see some of you bloggers add some navigation to your blog!
My internet has been acting up lately, so it is limiting me to post more.
Hopefully they will get things fixed soon, plus I have come down with something!
Sign up with your email address to receive the latest updates straight in your inbox.


Great tutorial! Fast and easy....
ReplyDeleteHi Linda, thank you for sharing this. I added mine some time ago and love it. It is really a help to visit others with these pages under their header.
ReplyDeleteI need to add tutorials to mine also. Just thought of that.
You are so talented and always a help to everyone.
Have a great day.
Hugs
I wish I was more pro-active on following your instructions but I give up easily when it comes to this stuff. The labeling has me miffed and I don't want to go through all my posts to change how I've labeled things. I'm so glad you've been my blog angel and helped me through the years.
ReplyDeleteOne day I will sit down..reread this and let it all sink in.
ReplyDeleteAgain..you are so gracious to share your knowledge Linda!
You're such a whiz at all these things, Linda! I appreciate all your tutorials and all your knowledge.
ReplyDeleteGreat tutorial, Linda! You make it so accessible for everyone. The tech end of things can be so intimidating for bloggers - myself included!
ReplyDeleteI'm really loving your blog look - so clean and bright. Can't wait to chat. Early next week work for you? )
You lost me. LOL! I need you to do it for me..... xo
ReplyDeleteGreat tutorial - thanks so much for sharing. I will be pinning this for future reference : )
ReplyDeleteOh, Wow..I did it! Thanks :)
ReplyDelete